Say hello to the modern balloon arch
If you haven’t noticed, balloon arches are quite the rage. And no—we’re not talking about the stereotypical arch structure you had at your high school prom; we’re talking about the next generation of balloon arch, pioneered by the incredible The House That Lars Built.
The modern balloon arch is organic in structure, rather than neat and perfect. More often than not, it also combines balloons of varying sizes, textures such as honey comb balls, as well as fresh florals and greenery.
To inspire your balloon arch creations, we’ve teamed up with our party pals Five Star Party Co to pull together some of our favourites below, as well as some tips and tricks to help you on your way to creating the ultimate balloon masterpiece. 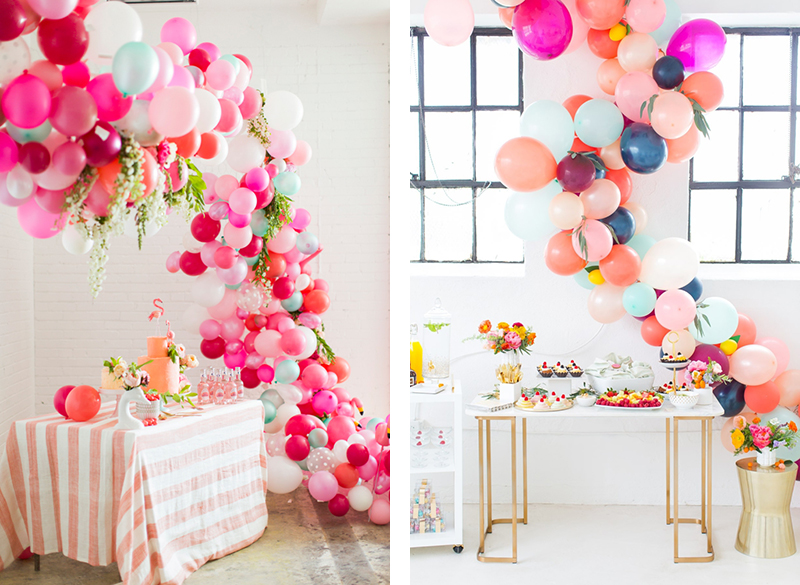
Left: House That Lars Built | Right: Sugar and Cloth
1. Pick colours for your balloon arch
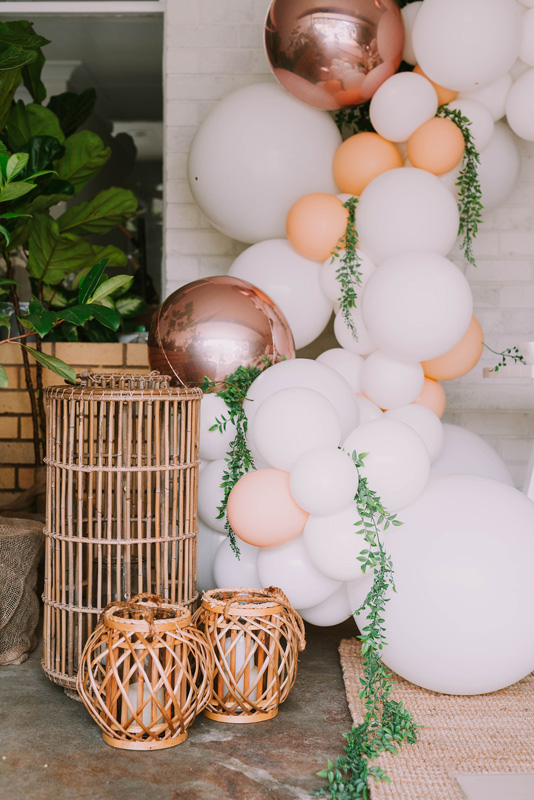
Ultimately, the best bet is to choose colours that will complement the palette for your overall event. Our fave colour schemes for balloon arches are monochromatic colours (one colour broken down into various tints, shades and tones), as well as analogous colours (colours that are next to each other on the colour wheel). You may also like to add pops of a complementary colour (a colour on the opposite side of the colour wheel), like the example below on the right, where shades of purple, pink and peach are complemented by pops of aqua. 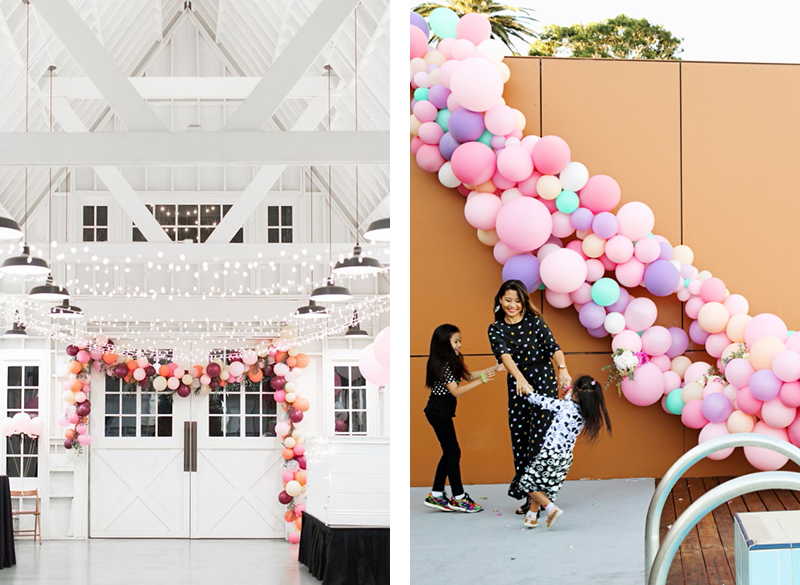
Left: Urban Palette | Right: Oh It’s Perfect!
2. Source balloons
Obviously, balloon arches require a lot of balloons! Depending on the size of your arch, you may need hundreds of balloons.
You might like to opt for a wholesaler who supports event professionals, like Five Star Party Co who can offer rates and have a huge range of balloons in various colours, sizes, and shapes. Plus, if you’ve got a set colour scheme, you can PMS-colour match your balloon selection with your other party décor—double win!
Source a mix of different sized balloons – big ones, little ones and everything in-between. Also, consider quality and go for balloons with high elasticity and lower burst rates, which is super important when working on such a large setup!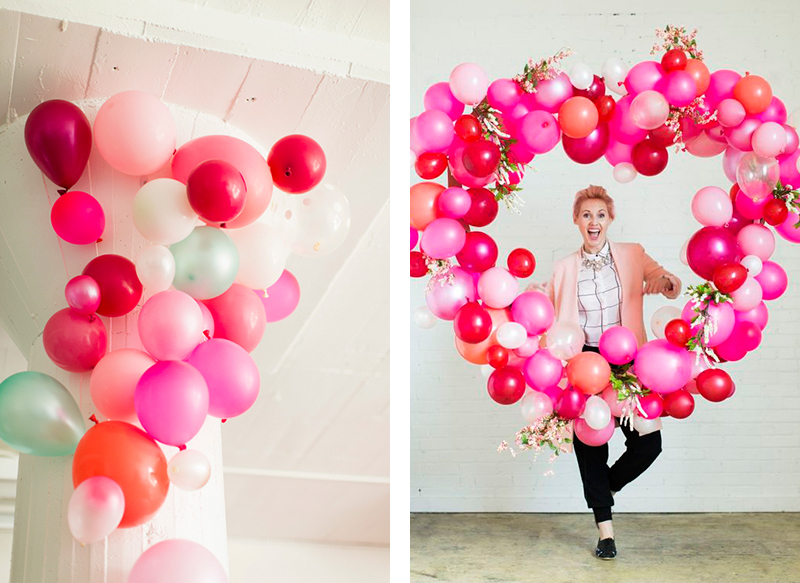
Left: House That Lars Built | Right: House That Lars Built
3. Source other materials
In addition to balloons, you’ll need a bunch of other bits and pieces, such as:
– A roll of flexible chicken wire to create the shape of the balloon arch (you can source this cheaply from the garden area in your local hardware store).
– Nails and hammer to attach chicken wire to a structure, or alternatively, stick and peel hooks or fishing line to support the chicken wire. Masking tape also comes in handy if attaching to a wall!
– Double-sided tape or glue dots to connect balloons to each other
– A balloon pump
– Fishing line or different types of tape to fix balloons to the wire
– Wire cutters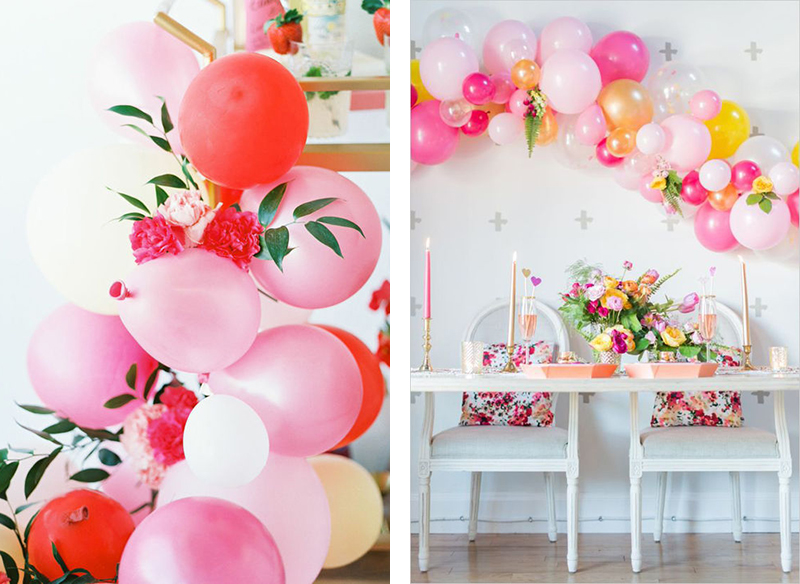
Left: Grit + Gold, via Design Love Fest | Right: Wedding Chicks
4. Hang chicken wire and attach balloons
Now you’ll need to attach the chicken wire to the roof. If you’re setting up outside, you could use fishing line to string it to a tree branch or outdoor structure. Otherwise, attach it to the roof indoors using either a hammer and nail or a stick-and-peel hook.
Bend the wire into the shape you’d like to achieve for your arch, then fold or trim the wire to the desired shape. If cutting the wire, you’ll need wire cutters – normal scissors just won’t cut it (literally!). ![]()
![]()
5. Attach balloons to the wire
Next, use a balloon pump to inflate balloons – helping hands always come in handy for this bit! Of course, you could also blow them up manually, but it will take quite some time (and you’ll be totally exhausted afterwards!).
Begin attaching the balloons to the chicken wire using pieces of fishing line. Start with the bigger balloons, then fill in gaps with smaller sizes. Continue this until the wire structure is covered in balloons.
Then, use tape to attach extra balloons to the balloons strung onto the wire. 
Image: Eden-Mae’s 1st Birthday, HOORAY!
6. Incorporate texture
Geometric shapes and patterns such as honeycomb balls and piñatas can add interest to your balloon creation. We suggest incorporating hanging decorations, such as tassels and honeycombs. You might also like to add some metallic finishes, such as metallic balloons, shiny tassels and accordion lanterns. 
Image: Ruby’s 5th Birthday, HOORAY!
7. Add florals
Add fresh blooms of greenery to give your balloon arch some added dimension. You could opt for florals in a similar scheme to your arch, or forage some fresh foliage from your garden, like the examples below. 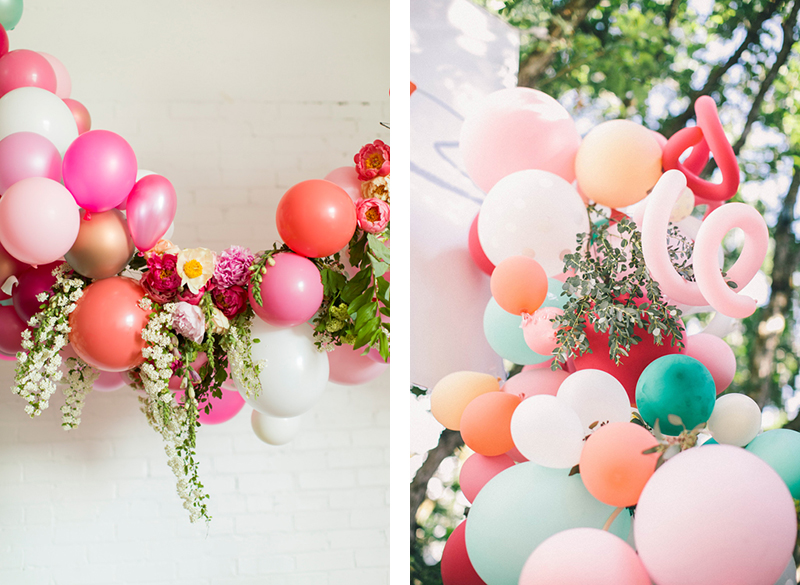
Left: House That Lars Built | Right: House That Lars Built
And that’s it!
Well folks – that’s it, so all the best for your ballooning! We would love to see your balloon creations, so hashtag #hooraymag on social media, and we’ll be sure to check them out!