Craft > Decor > DIY > Florals
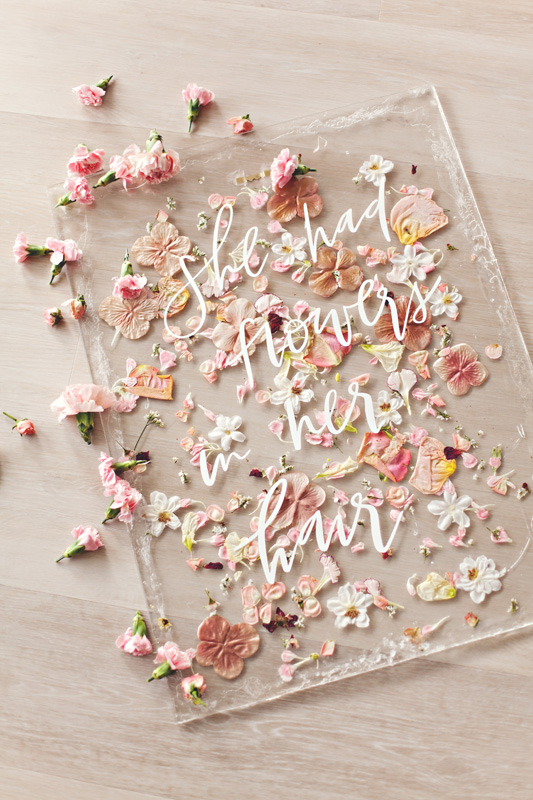
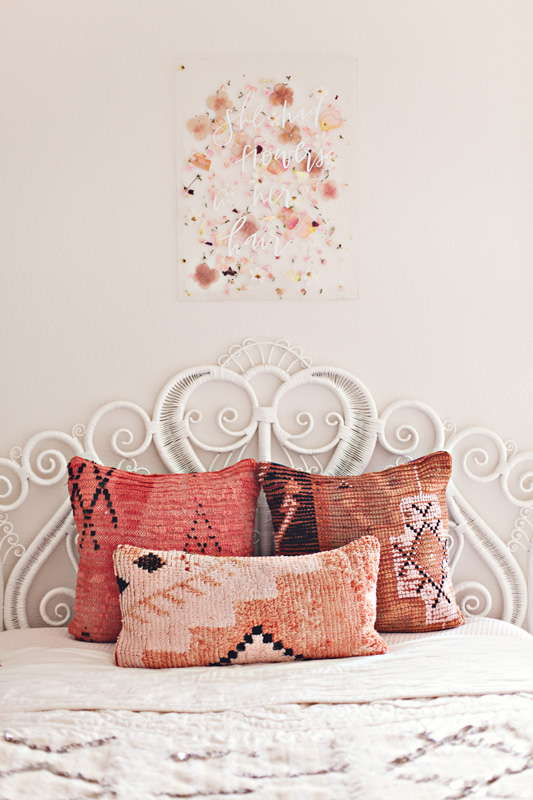
DIY Pressed Flower Wall Art
Monday, February 19th, 2018 | By [email protected]
Want to recreate this DIY Pressed Flower wall art?
Looking to create your own event signage? This pressed floral acrylic artwork is easy to make and totally gorgeous!
It’s crafted by the talented ladies at Beijos Events – and isn’t it pretty?
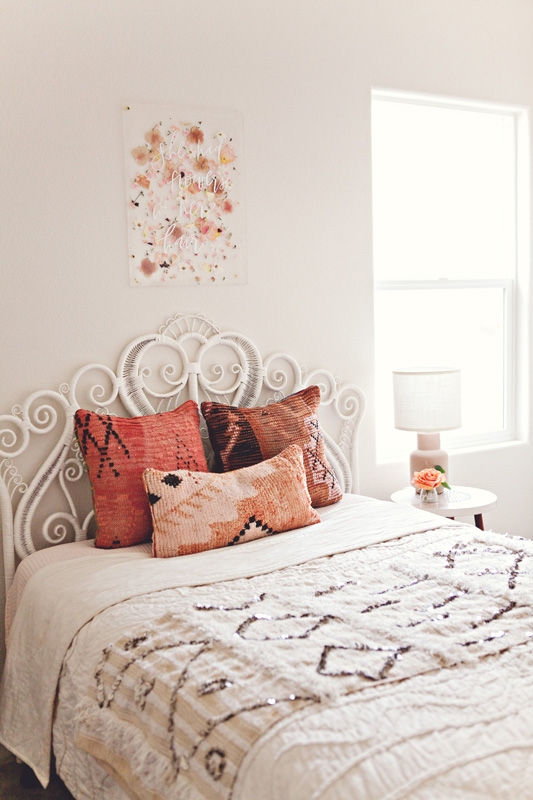
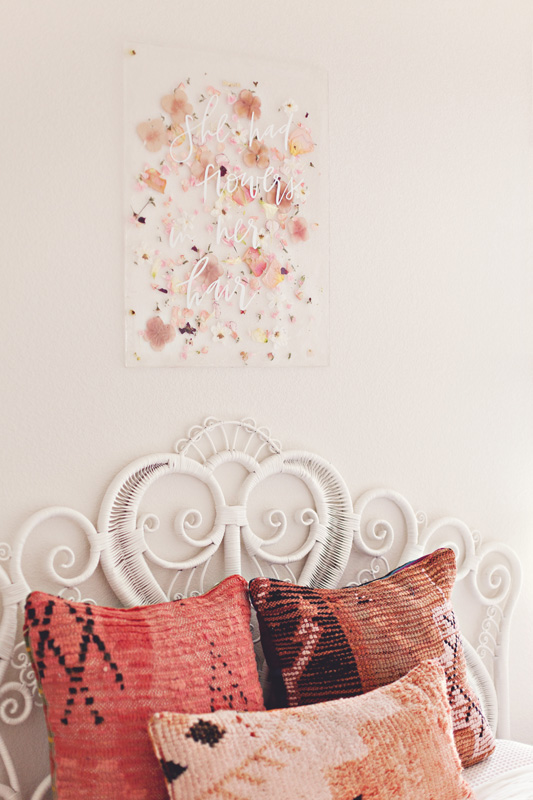
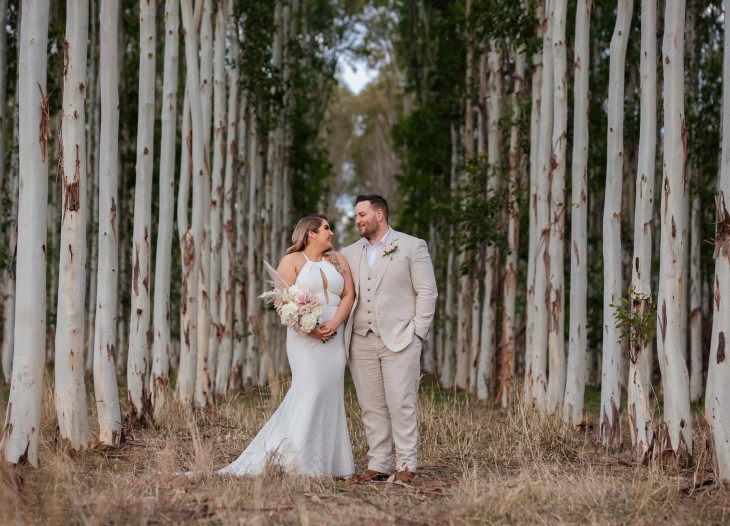
We think it would be the perfect piece of decor for a bridal shower, baby shower, garden wedding reception or event just for home decor.
Below you’ll find all the steps you’ll need to create one for yourself. 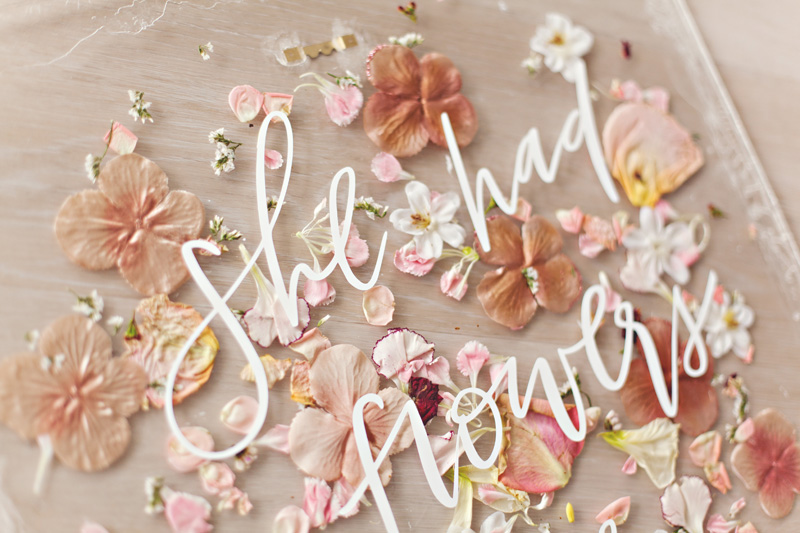
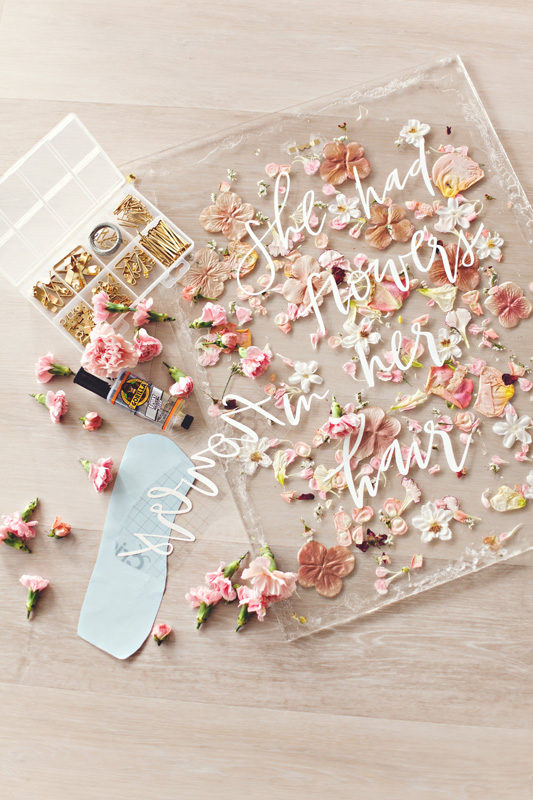
WHAT YOU’LL NEED
Vinyl Sticker Lettering or Calligraphy skills
2 Acrylic Sheets (any size you want)
Flowers (Dried or Real or Both)
Gorilla Epoxy
Picture Backing + Nails
Hammer
Cameo Machine
Clamps or Heavy Objects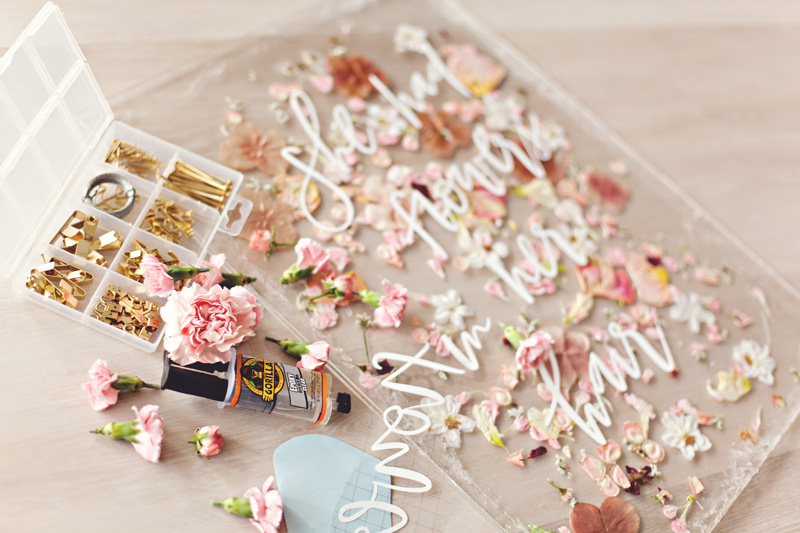
WHAT TO DO
STEP 1:
First, let’s discuss acrylic. You can order yours through Amazon or go where I get all my acrylic through Tap Plastics. Straight to the source. Remember the larger the piece, the more reinforcement you will need for hanging. I went with 18X24 sheets. Tap Plastics will deliver to your house, or if there is a nearby store, you can pick up that day.
STEP 2:
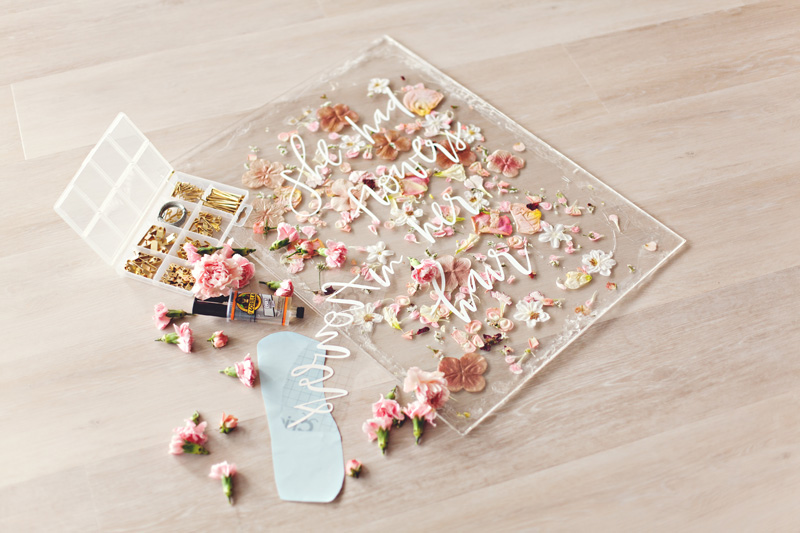
Next up, the writing. I choose to use vinyl lettering since my calligraphy skills do not need to be seen around the world. Meghann Miniello created my phrase, and I took her file and created a vinyl sticker using the Cameo machine. This machine is a game changer if you do a lot of projects with lettering for stickers, shirts, signage, you name it. Definitely worth it!
STEP 3:
Lay the wording out on the acrylic sheet where you desire. Then once you have them in their desired spot, do each word at a time. You just peel back the backing and place the vinyl on the acrylic, and then SLOWLY peel the front clear sheet up, at the same time making sure the lettering is adhering correctly to the acrylic.
STEP 4:
The fun part. The flowers! I used a mix of real flowers and silk flowers. I had a particular colour palette in mind but had trouble finding the colours I wanted at my local market. This is where I added some silk flowers, and it helped me achieve the colours I was looking for. Also, another thing to remember is when you use real flowers they will become dried flowers so the colour will change. Sprinkle and place your flowers where you desire.
STEP 5:
Grab your other acrylic sheet, and begin placing the flowers on top of it. I just tossed them about and moved them around to cover some empty spots. Feel free to get creative and do some pattern or design with the flowers. You can also use greenery as well. I wanted the flowers to be the backdrop, so I went a tossed look. I did place my silk flowers in certain areas.
*Tip- Place your acrylic that has your lettering on it and place it once in awhile on top of your other board with the flowers to see how it will look once you combine the two. You can adjust as needed.
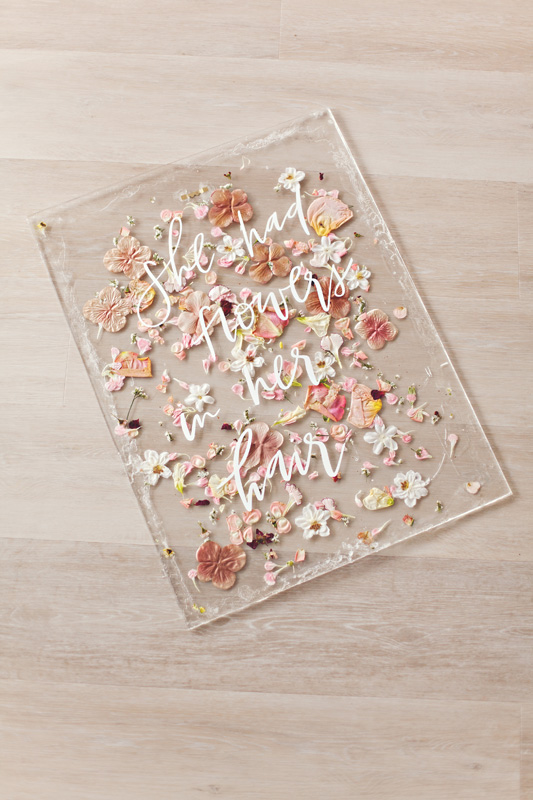
Pretty easy right? Ok, let’s get to the hard part. But you can do this!
STEP 6:
Epoxy is something not to mess with once it’s mixed. So be cautious with this and its a good idea to do this part outdoors or in the well-ventilated garage. Follow the directions on the glue, and once mixed, place a thin line towards the edge on one of the sheets, the glue will dry clear. But if you use a lot, its ok, cause once it’s hung up, you really can’t see it. Place the other acrylic sheet on top and make sure its aligned correctly. Using clamps or heavy objects set on top of the layers and allow it to dry for an hour to set. I let mine sit overnight. Be sure all the corners and sides are pressed down with something substantial, or they will not seal properly.
AND THEN
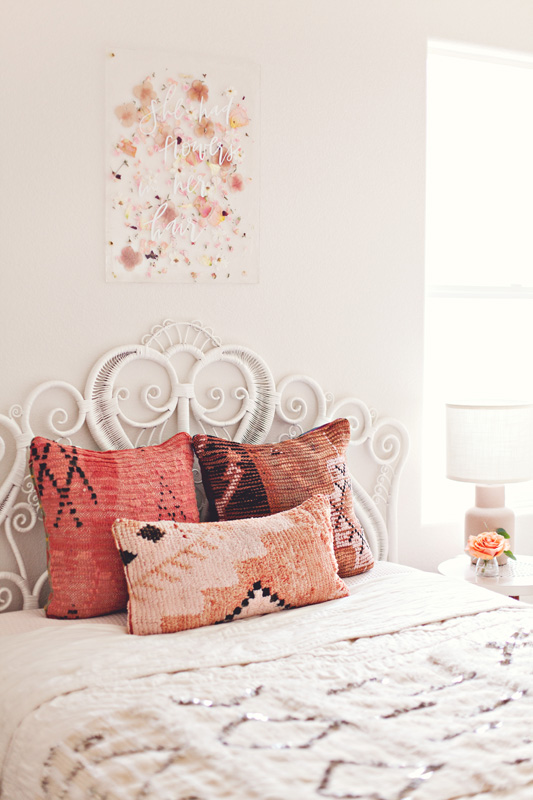
Finally, adhere the picture backing to the backside with either more glue or you can drill one in. Once thoroughly dried, you can hang it up!
This post was originally created by Abby of Beijos Events. ![]()

![]()
![]()
DIY Pressed Flower Art