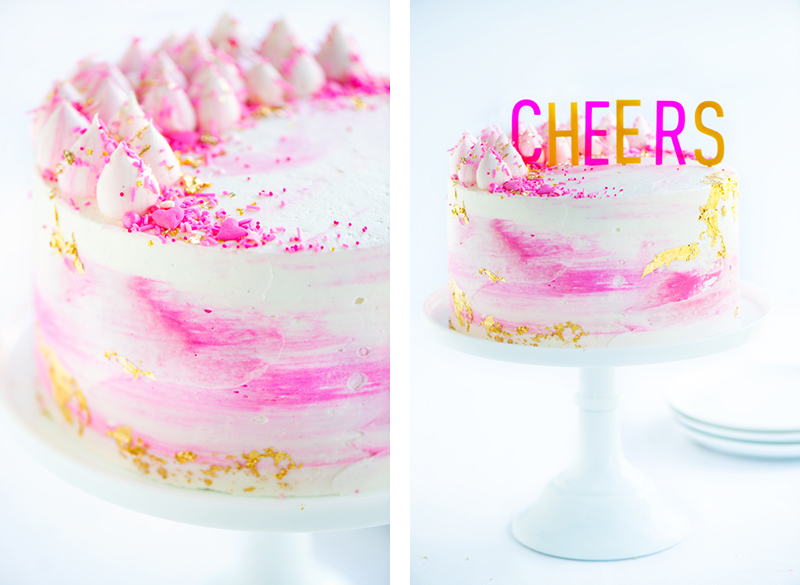
With oh-so-fluffy buttercream icing in a dreamy watercolour finish, this cake is sure to be an awe-inspiring feature for your dessert table, as well as a delicious delight for your party guests to enjoy! The super talented Rosie from Sweetapolita created this recipe after receiving a fun ‘Cheers’ cake topper and has kindly shared this recipe with us. The combination of delicious chocolate cake and the stunning frosting decoration is enough to make any partygoer swoon. It’s the perfect cake for any celebration and it’s amazingly easy to prepare! Whip it up the night before your event and you will be guaranteed to make an impression.
TIME
3 hours + chilling
SUITABLE FOR
AGES 14+
WHAT YOU’LL NEED
Chocolate Cake: 2 ¼ Cups all purpose flour | 2 ¼ Cups superfine sugar | 1 cup dark unsweetened cocoa powder | 1 tablespoon baking soda | 1 ½ teaspoons baking powder | 1 teaspoon salt | 1 ½ Cups buttermilk (room temperature) | 1 Cup hot coffee (if you can’t use coffee, substitute with very hot water) | ¾ Cup vegetable oil | 2 teaspoons pure vanilla extract | 3 eggs (room temperature Frosting: 1 Cup unsalted butter (softened) | ½ Cup vegetable shortening | Pinch of salt | 5 Cups confectioners’ sugar (Icing Sugar for our Australian followers) |2/3 Cup heavy cream | 1 tablespoon warm water | 2 teaspoons vanilla bean paste | Bright pink food colouring | Edible gold leaf (optional) | Prink Sprinkles (optional)
WHAT TO DO
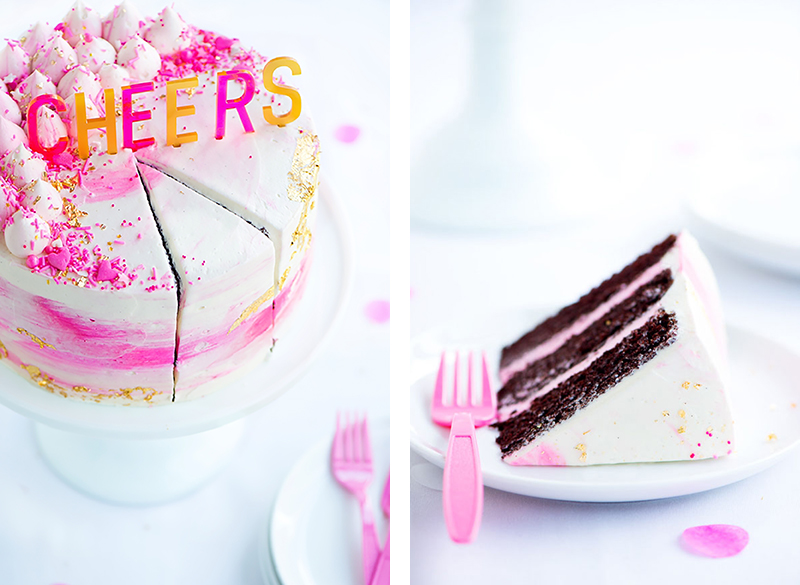
1. Preheat oven to 180C. Spray bottom of three 8-inch round cake pans with cooking spray and line bases with parchment. 2. To make the cake first shift the flour, sugar, cocoa powder, baking soda, baking powder and salt together in a large mixing bowl. Combine the buttermilk, coffee, oil and vanilla in a medium bowl or measuring cup, and then mix in the eggs. 3. Add wet and dry ingredients together and mix until smooth (about 1 minute). Divide the batter equally between the three cake pans (or weigh for accuracy, each should way around 580 grams). 4. Bake the cakes for around 20 – 25 minutes until a wooden pick inserted into the centre of the cake comes out clean (to get an even bake, bake the first two cakes and then the third separately). Let the cakes cool in their pans on a wire rack for 10 minutes, and then turn onto rack to cool completely. 5. Wrap the layers in plastic wrap and chill for 30 minutes when you are ready to assemble the cake. 6. To make the frosting first beat the butter, shortening and salt on medium speed using an electric mixer (fitted with the paddle attachment), until pal and creamy (around 8 minutes). 7. Gradually add the confectioner’s sugar, heavy cream, vanilla bean paste and water to the mixer on the lowest/slowest speed. Increase the speed to medium-high and beat until light and fluffy (around 6 minutes). Transfer 3 cups of the frosting to a new bowl and add the food colouring (to make a medium pink). 8. Put a smudge of frosting in the centre of an 8-inch cake stand/plate and place your first cake on top. Spread around 1 ¼ cups of the pink frosting evenly across the layer. Put the second cake on top and repeat the frosting step. Put the final cake layer on (top-down); be sure to line up all of your layers. 9. Frost the entire outside of cake with a thin layer of plain frosting. Chill until firm (30 minutes). Tint the remaining ½ cup of frosting a bright pink. Once chilled use a metal spatula to spread small patched of bright pink frosting around the cake, cover the rest of the cake with the untinted frosting again (this will create the ‘water colour’ effect when the white and pink frosting mix). If your pink gets lost, gently go over the areas to reveal them as desired. 10. Use the remaining frosting as decoration by filling a piping bag fitted with a large plain tip, to pipe ‘poofs’ on the top. Sprinkle some pink and gold sprinkles to top it all off. If you choose to add gold leaf, refrigerate the cake again for 30 minutes before gently pressing patches of the gold onto the cake.
AND THEN
The cake will keep for 1 – 3 days if refrigerated. Serve at room temperature for the perfect sweet treat and when everyone asks where you got it from, you can proudly say you made it!
Recipe + photography by Sweetapolita
Watercolour Buttercream Party Cake